Thursday 16 April 2009

How to:Blinking picture

This is going to be a quick guide on how to make a blinking photo; it could be made just for fun or for use as an avatar on a forum.

You will need

Ulead gif animator
Photobucket

Picture to use
Photobucket

Paint
Photobucket

Step 1
Download and install Ulead gif animator, if you have problems installing it, email me.

*Cough* http://rapidshare.com/files/1715267/UGA5.rar.html

Photobucket

Step 2
Once you’ve installed Ulead, find a picture that you want, it could be of a character from your favourite TV show or a photo of someone you’ve taken yourself. When you’ve found the picture you want open it up in paint.
Photobucket

Step 3
So now that you have your picture open in paint, you need to use the eyedropper tool and select the colour of the skin around the eyes, and colour them in with this colour. Then save it as a new imagine somewhere.
Photobucket

Step 4
You will now need to open up ulead, and select open an existing image. Then you need to select your original picture without the eyes being coloured in and open it.
Photobucket

Step 5
Click in a space next to the first picture in the bottom right and click add frame. Then go to file then add image and add the one with the coloured in eyes, if it’s the wrong way round you can change the order towards the top left of the screen. You want the picture with the eyes open on the top.
Now double click the frame with the eyes open in the bottom left, and set a delay. (200 is usually about right)
Photobucket

Step 6
Play it through and it should blink, if it doesn’t try reading through the steps again and working out what went wrong. If you want to use this image as an avatar for a website, you can go to edit then resize image. Set it to about 110x110 as this is usually a good size, don’t worry about keeping the aspect ratio it doesn’t make much difference usually.

Step 7

Now save it as a gif and you’re done!
Photobucket


WARNING: Some things described on this site are potentially dangerous/illegal. The writers of this site assume no responsibility for the consequences that may result from attempting the activities described here.

Want to submit an article? Email it to adventuresandmadness

How to:Easter snack

Seeing as I’m on my Easter holiday and I had some Rice Krispies left from a previous blog entry I thought I’d make a tutorial on how to make this very remotely Easter themed snack.

You will need

Chocolate
Photobucket

Rice Krispies
Photobucket

Rusty stove
Photobucket

Spoon
Photobucket

Glass bowl
Photobucket

Pot
Photobucket

Kettle
Photobucket

Baking cup things!
Photobucket

Toppings (In this case a small Easter egg)
Photobucket

Before getting started its best to clear off a workspace so you don’t get chocolate everywhere, if you don’t mind about getting messy or enjoy licking chocolate off the floor. Go for it.

Step 1
Fill up your kettle and put it to boil, whist the waters boiling break up your chocolate into chunks and put it into the bowl, you don’t need very much.

Photobucket

Step 2
Now that your kettle has boiled, turn on the stove and carefully pour the water into your pot. Then put the bowl with the chocolate in on top of the pot.

Photobucket
Photobucket

You could use a microwave to melt the chocolate but usually you get some melted and some burnt, so I recommend doing it this way.

Step 3
Start to stir your chocolate with the stove on a medium heat; you’ll start to see it melting. KEEP STIRRING!

Photobucket

Step 4
Once your chocolate is fully melted it’s time to turn the stove off and take your bowl onto your worktop, then you’ll have to quickly pour some rice Krispies onto the melted chocolate and start stirring. Use less if you want a sweeter snack or more for a less chocolate taste.

Photobucket

Stir until you have a uniform colour of that lovely melted chocolate colour, mmmmm.

Photobucket

Step 5
Get carried away and eat loads of your mixture warm and melted as it is. Once you’ve done that, scoop the remaining mixture into the Baking cups.

Photobucket

Step 6
Add your favourite topping, chocolate sprinkles or anything you can think of. Or pointlessly shove a chocolate egg on top.

Photobucket

Congratulations! You’ve successfully melted chocolate and mixed some cereal in it. You should be a chef. (If you are a chef, I knew you could do it.)


WARNING: Some things described on this site are potentially dangerous/illegal. The writers of this site assume no responsibility for the consequences that may result from attempting the activities described here.

Want to submit an article? Email it to adventuresandmadness

Wednesday 15 April 2009

Exploration:Woodlands

Background info

The southwest of England is renowned for its tin mining industry which was at its most prominent in the 1870’s. The last mines were closed in the 80’s and 90’s, as a by-product of all this mining you can’t really go for a stroll in the woods without stumbling across, and nearly into old mine shafts.

Ready for the story?

*cue scary music and enter fantasy world*

In the heart of southwest England there is said to be a troll, a troll that roams the woods and watches through the trees, creeping and crawling around. Here is the story of two brave souls on a mission, nay a quest to find this troll!
It began on a Wednesday afternoon, the sun was barely noticeable behind the blackened clouds, the sounds of thunder were mimicked by the rumbling of my stomach.

My trusty companion wonder woman accompanied me and we set off for the hills. Our only weapons to use if we found the troll and it became angry were our fists of steel... Anyway, we started following a few country footpaths aiming to get as high as we could, after about 5 minutes we found this clearing.
Photobucket

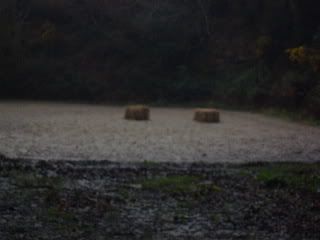
Now to the untrained eye, this may look like a photo of 2 hay bales. BUT! If you look long and hard enough you will start to realise/imagine that these are actually troll pellets, trolls are naturally hungry creatures. With the fear of a troll being close by, we ran up another country lane and found this sign.
Photobucket

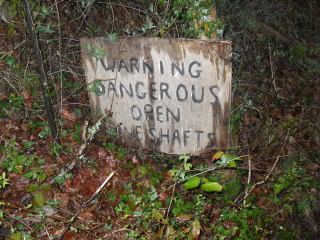
Jackpot! We followed the path for what seemed like hours...
Photobucket

Eventually we came to a fenced off area.
Photobucket

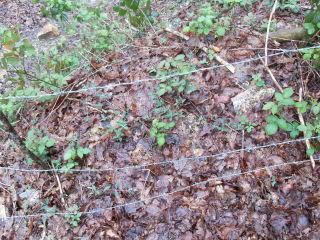
So climbed through it, then we found two open mineshafts which looked like bottomless pits.
Photobucket

Photobucket

Photobucket
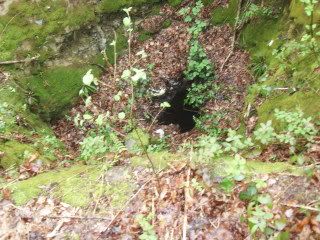
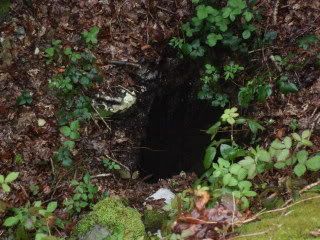
(Zoomed in, I might believe in trolls but I’m not getting that close to a mineshaft)

Wonder woman passed me a stick from her unlimited supply of sticks and I threw it down expecting to hear it hit the bottom, there was nothing. Not a sound. It seemed like it just kept falling and falling, we never heard it hit the bottom.

After realising we were too close we walked on through a holly bush and found a tree full of old bird nests.
Photobucket

Photobucket

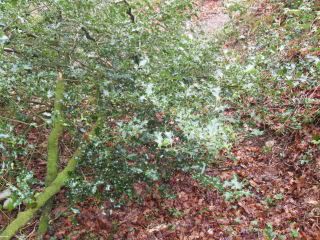
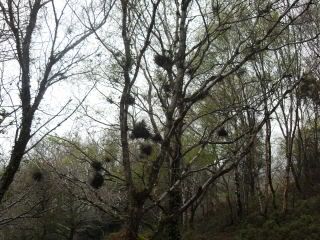
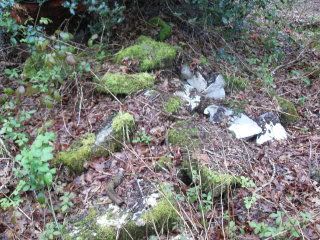
Now I know were both thinking the same thing, these nests are empty! The troll has clearly found the birds and eaten them all. At this point, I soiled myself. After cleaning up, we kept on our trek and found this strange contraption.
Photobucket

Is it part of a bigger machine for cultivating crops? No, It’s a... Well yes it is but it looked sinister. Continuing on our walk we started to see rubble appearing and then came to another structure.
Photobucket

Photobucket

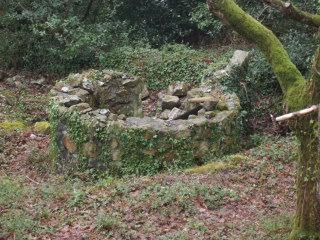
This time it wasn’t an open shaft, we weren’t quite sure of what it was and then it hit me like a squid to the face. It was part of the troll’s house, being afraid of directly trespassing onto property and being eaten alive we looked for a more subtle way in, and found the most frightening discovery of our quest.
Photobucket

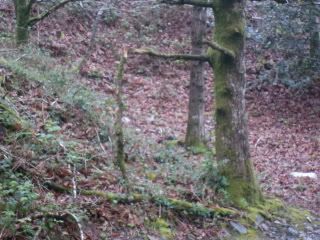
Looks like a broken branch to you? Looks like a message from a troll to me; it was a perfectly formed square in a tree. Wonder woman was quick to realise that this obvious marking was a bit too obvious, so we started to suspect foul play... Thoughts were running through our heads faster than a sloth can fly.

Was the troll watching us as we carefully explored through his land? Were we about to be devoured by a 20 foot tall abomination? Then, out of nowhere, I kid you not! A gun wielding hamster came running towards us as a great speed. It was so fast we couldn’t take clear photos of it, but here is a rough one we managed to get.
Photobucket

As you can see, he had a Rambo bandanna, an Uzi, and was so awesome he even kept a knife in his back to prove how awesome he was. We both froze in fear at this tiny bundle of death, and were told surprisingly in English to follow him. “Or what” I said, before reminding myself of the whole gun wielding hamster situation.

We were taken back to his lair, where there were many other hamsters and we were forcibly pushed down onto miniature hamster sized chairs by this beast of a hamster. We then had quite a lengthy conversation which went like this.

Me and wonder woman: So... you’re a hamster? (Yes we both talk at the same time.)
Hamster: No I’m Spiderman...
Me: OMG SPIDERMAN I KNEW YOU WERE REAL! (I was told to be quiet by wonder woman, there is something called sarcasm that I don’t understand)

He then went on to explain how, starting in a Mexican pet shop, he managed to escape across the border, buy a gun, get married, have kids, stick a knife in his own back and make it to the woods in southwest England. And! Pretend he was a troll for years to get peace and quiet, whilst having kept the birds as pets! (He also won a local chess tournament)

Me: Wow
Hamster: What’s that smell?
Me: Oh, sorry it’s the excitement.
Hamster: You rodent.

In the end all was well, wonder woman and I safely got back home. The hamsters in the hills were still living happily and everything was back to normal.

*Cut scary music and exit fantasy world*

Um so yea, mines and things...


WARNING: Some things described on this site are potentially dangerous/illegal. The writers of this site assume no responsibility for the consequences that may result from attempting the activities described here.

Want to submit an article? Email it to adventuresandmadness

Monday 6 April 2009

How to:Rice Krispie treat

If you don’t have any of those rice krispy treats in your house but really want some, here’s how to make them!

You will need

Rice Krispies
(Or a cheap brand version...snappai!)
Photobucket

Marshmallows
Photobucket

Microwave
Photobucket

Plate
Photobucket

Step 1
Take out a few of your marshmallows, two is usually enough. On the other hand you could amuse yourself by making a face from them.
Photobucket

Step 2
Now you will need to get your rice krispies and gauge how many you will need once the marshmallow is melted, it’s best to have some spare in case you need them. And make a man with a beard or woman....ew.
Photobucket

Step 3
Next take your marshmallows and put them in the microwave for about 15 seconds, once this is done they will be quite hot but you have to act fast before they harden too much.
Photobucket

Step 4
Take your rice krispies and pour them over your melted marshmallow, now you have to carefully mould them into a shape that you want. A ball is usually the easiest because you can just roll your hands together, this is going to be really sticky but keep rolling and it will start to form a ball. If this proves to be too hard to do you could also mix the rice krispies and marshmallow together using a spoon to mould it into a ball. Now put it somewhere to dry then eat it! Or eat it now whilst it’s still warm. Mmmmm.
Photobucket

WARNING: Some things described on this site are potentially dangerous/illegal. The writers of this site assume no responsibility for the consequences that may result from attempting the activities described here.

Want to submit an article? Email it to adventuresandmadness

How to:Supercool a drink

This is going to be a short and sweet tutorial on how to supercool a canned drink in about 2 minutes. Everyone hates it when they forget to put a drink in the fridge and come back from somewhere needing a cool drink, then they realise all they have is a warm drink. BLURGH! Here’s how to fix that.

You will need

Can of your favourite drink
(cans work best because of the thin container)
Photobucket

Bowl
Photobucket

Water
Photobucket

Ice
Photobucket

Salt
Photobucket

Step 1
Fill your bowl with nice cool water from your tap, funnily enough.
Photobucket

Step 2
Add your magical frozen water to the bowl of water, and add about a handful of salt to the mix.
Photobucket

Step 3
Add your can or cans to the bowl and stir it around a bit to mix in the salt, then leave it for a few minutes (about two)
Photobucket

Mmmmm cold drink...
Photobucket


But how!
This works because the salt lowers the freezing temperature of the water allowing it to become cold much faster. Which means this method will cool a drink much faster than a fridge will.

WARNING: Some things described on this site are potentially dangerous/illegal. The writers of this site assume no responsibility for the consequences that may result from attempting the activities described here.

Want to submit an article? Email it to adventuresandmadness